
Home Owners
Pulldown Ladder Jacket
- Reflects 97% of Radiant Heat
- Insulates & Air Seals Attic Access
- Quick Installation
- Easy Zipper Access to Attic
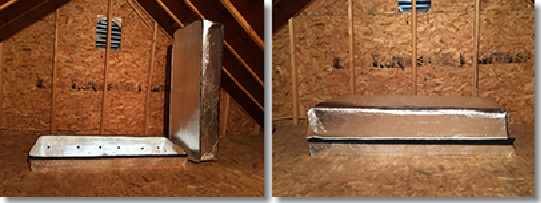
Meets and Exceeds Code Requirements for All Climate Zones
Don't Let Your Hard Earned Money Slip Through The Cracks!
EASY TO INSTALL WITH A THERMAL VALUE UP TO R-58
(Please read below for R-Value Chart)
Step 1
Insert Insulation
Open the top sleeve of the jacket and insert the recommended or desired insula on into the opening.
Once the Velcro is inserted just simply fold the ends of each top side down and attach the
Velcro strips together to secure the insulation in place. Once the Velcro is fastened take the
outside corners and fold them away inside of the top sleeve.
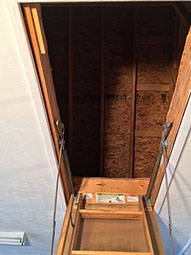
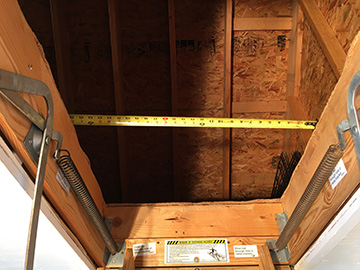
Step 1: Open attic access, pull down stairs,
and measure opening.
Step 2

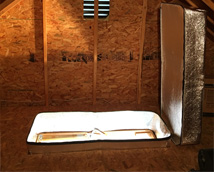
Step 2: Place Ladder Jacket in opening with
label facing you. Secure in place with
button nails or stapler
Install the jacket into the a c access opening.
a. Place the jacket in the access opening just above the framed a c stairs with the zipper side facing the direc on in which you climb up the ladder. The product label is always right below the zipper, the orange zipper color helps for easy iden fica on.
b. Make sure the jacket is resting on the top of the pulldown stairs all the way around the ladder framing. Make sure any shims that are res ng above the ladder framing are cut out and removed prior to installa on to create a sealed fit all the way around the perimeter.
c. Star ng from the zipper end of the jacket install one of the cap nail fasteners through the unit into the wood framing about 2” to 3” above the jacket where it is resting on the stairs framing.
d. Con nue to a ach fasteners from each d irec on 8” to 10” apart un l you reach the opposite end of the jacket, at which me you install a fastener, at the center of the overlap
end.
Step 3
Once fastening is complete use spray foam caulk (Great Stuff or to the like) and seal along the bo om side of the product where it rests on ladder framing.
(This step is optional)
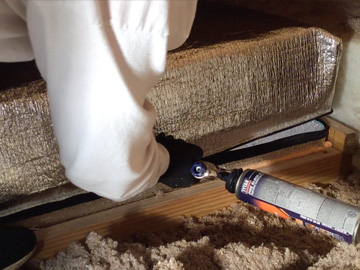
Step 3: Once secured in place use spray foam
caulk between attic access and cover.
Step 4
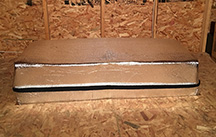
Step 4: Pulldown Ladder Jacket after proper installation.
Upon installation of the jacket you may enter the attic by simply pulling the two zipper sliders in opposite directions around to the opposite end of the jacket to enter the attic. When leaving the attic pull the zippers back around to the front side un the zippers meet and that seals the jacket closed.
*Please refer to this website for instructional videos and technical assistance when installing your Pulldown Ladder Jacket.
Warnings and Precautions:
NOTE: Do not allow product to become damp or wet while rolled in sealed bag
Do not set product directly on wet or uncured concrete.
WARNING: Although LOW-E Insulation Products are all fire tested to ASTM and/or NFPA standards; it is
recommended that they or any insulation material should not be exposed to open flame or other
ignition sources of sufficient intensity during shipment, storage or installation.
Aluminum is an electrical conductor. Please use caution when working around electrical sources
For any questions or comments please contact us at: 434-941-0584
©Copyright 2017 - Southeast Energy Solutions
The Pulldown Ladder Jacket is registered under Patent #9695630